Please enter your e-mail address and select your state of residence.

Loving Lidia's in Kansas City…

April 19th, 2012

I have to admit, few chefs on TV can “cook from the heart” like Lidia Bastianich. Everything about her is authentic… from her Italian roots to the mouth watering cuisine. Is it true that everything tastes better with an Italian accent?

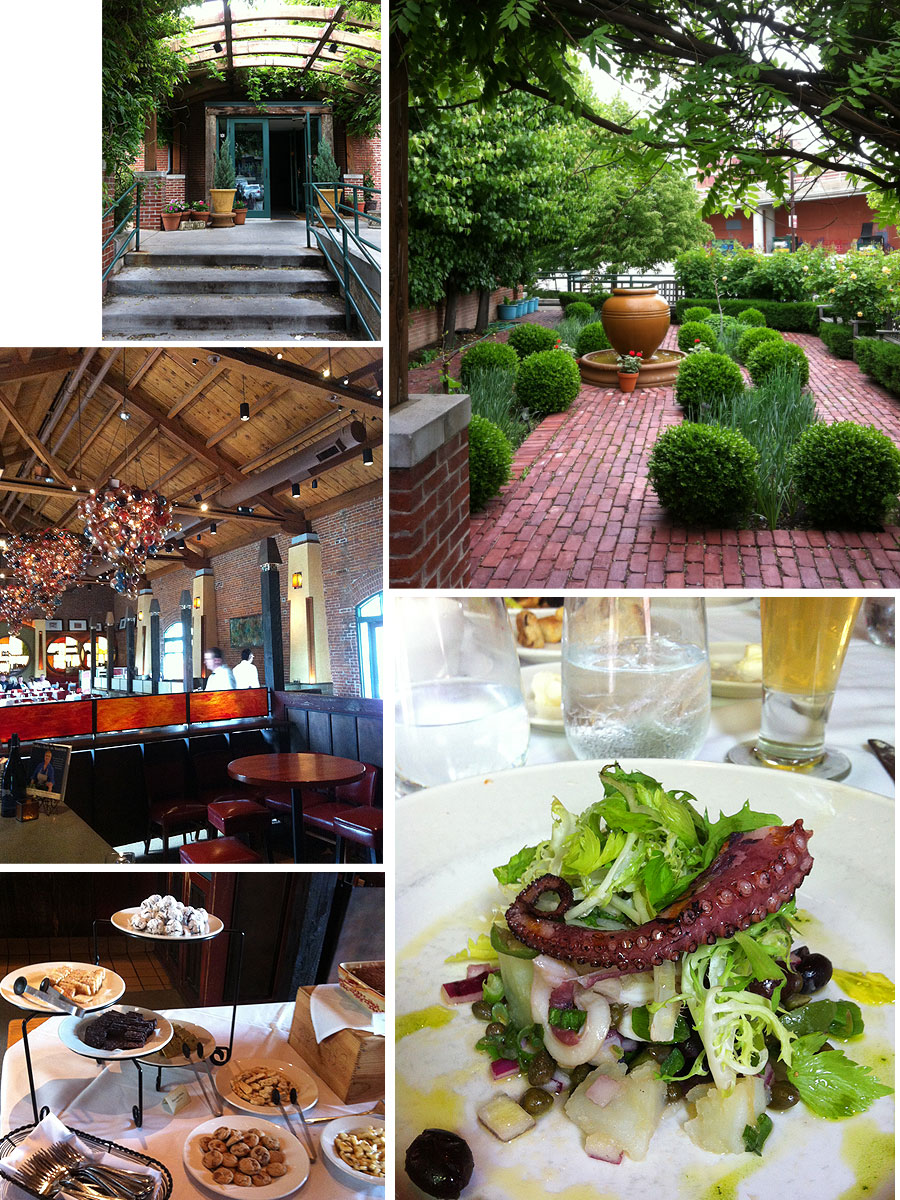
I’ve watched Lidia’s shows on PBS for as long as I can remember and after each show I vow to make one of her dishes. She just makes it look so easy! Now that I live in Kansas City, I had to visit her restaurant… Lidia’s Kansas City. Here are some photos from our visit.

Her restaurant is contemporary but homey. High ceilings, earthy colors, white linen, and of course, incredible food! The front of the restaurant has a beautiful garden, which is the perfect first impression. Inside, you will find a beautiful fireplace, wood beamed ceilings and so much more!

We came for Sunday brunch with friends. The brunch was three courses. The anti-pasta and dessert were available on the self-serve buffet. However, you had to order off can you order cialis online the brunch menu for your main dish. I chose the octopus salad and absolutely LOVED it. It was a wonderful brunch and perfect fuel for the afternoon of museum hopping we had on the agenda.

I love Halloween!

April 13th, 2012

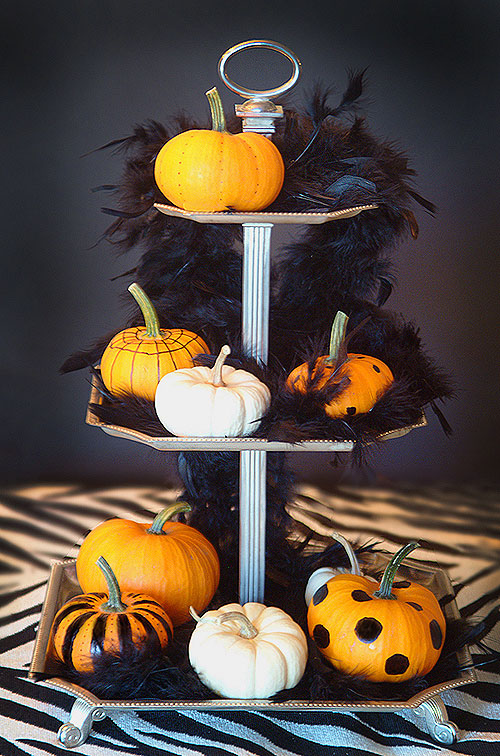
Halloween is a wonderful time of the year!  Especially when I look through photos of some of the fun things I have made over the years.  I found these two photos as I was going through my old photos.  Over the years, I have fallen in love with Halloween for so many reasons.  Below is a centerpiece I made when I was showcasing many different centerpiece ideas for Halloween on Great Day St. Louis, a local TV show.  This was one of them.  The goal was to create something that was SUPER easy and that the kids could help you put together.  I had my kids draw on small pumpkins… polka dots, stripes, dots, etc. and arranged them on a dessert tray.  I topped the arrangement off with a black feather boa and done!!


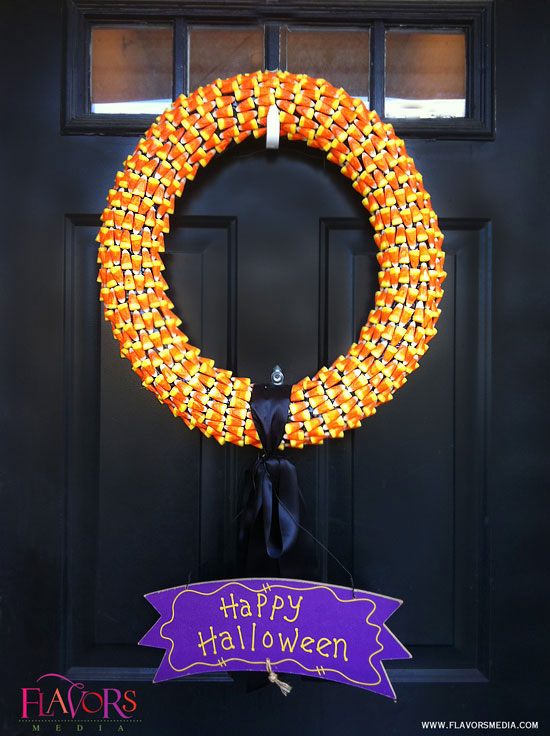
Another fun thing I created last year was this candy corn wreath.  It was super easy!  I wrapped a foam wreath in black duct tape and hot glued the candy corn to the wreath.  I need to dry the candy for one week to get all the moisture out, which was the hardest part of the project since I wanted to snack on them every time I walked by them.  But I resisted and had all the necessary candy to get the wreath finished.  However, I have a WARNING for you!  If you are planning to show off your candy corn wreath outside, make sure it’s a cool and dry day.  I stored my wreath for the entire year and when I took it out of storage, it looked great!  However, we had a humid and hot day (the 70’s) and I forgot to take down the wreath.  Guess what happened?  The candy melted and dripped all over my door.  So my best advice is to enjoy this wreath indoors!

Welcome Spring!!

April 12th, 2012

Photography By Arina Lanis
Styling by Sandra Meyer of Petals Galore 

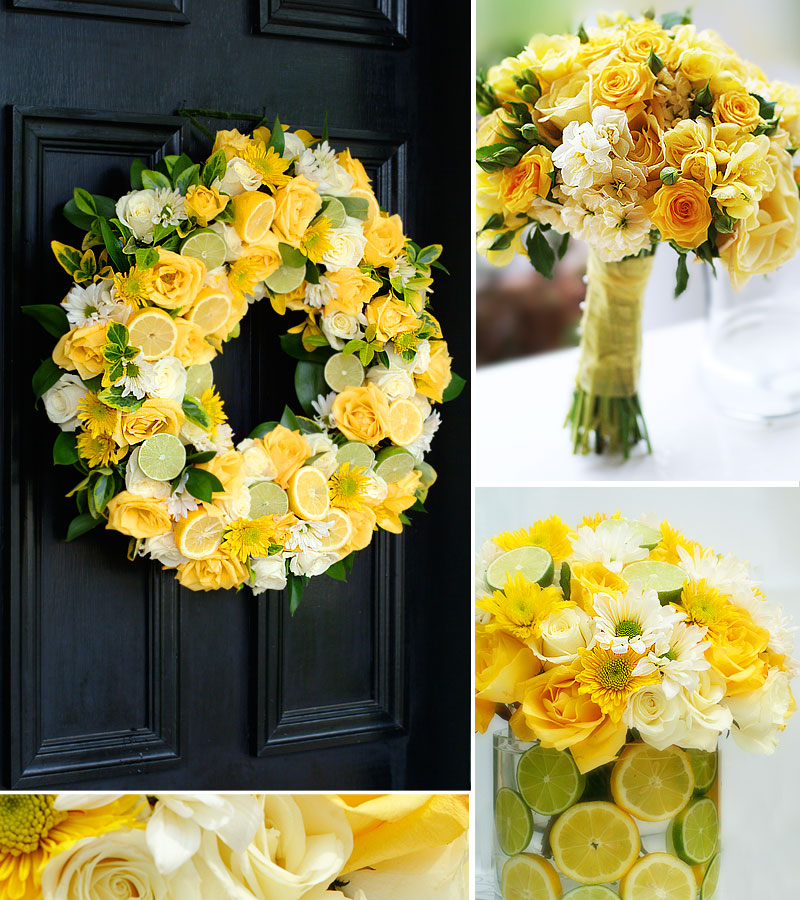
Spring is here and I just love it!  I was going through my old photos from past photo shoots and found this collage which I created after I photographed a Citrus Themed Wedding created by my wonderful friend and floral diva, Sandra Fulton from Petals Galore!  This woman is incredible.  I asked her if she could create a fun wreath and centerpiece with a citrus theme.  Not only did she hit the mark, but she absolutely went above and beyond… plus threw in a bouquet as well!  I can stare at this collage forever and not get tired of it!  Wouldn’t this design theme be perfect for a wedding, Easter, or Mother’s Day? LOVE!!!!

Party Style File – March

April 9th, 2012

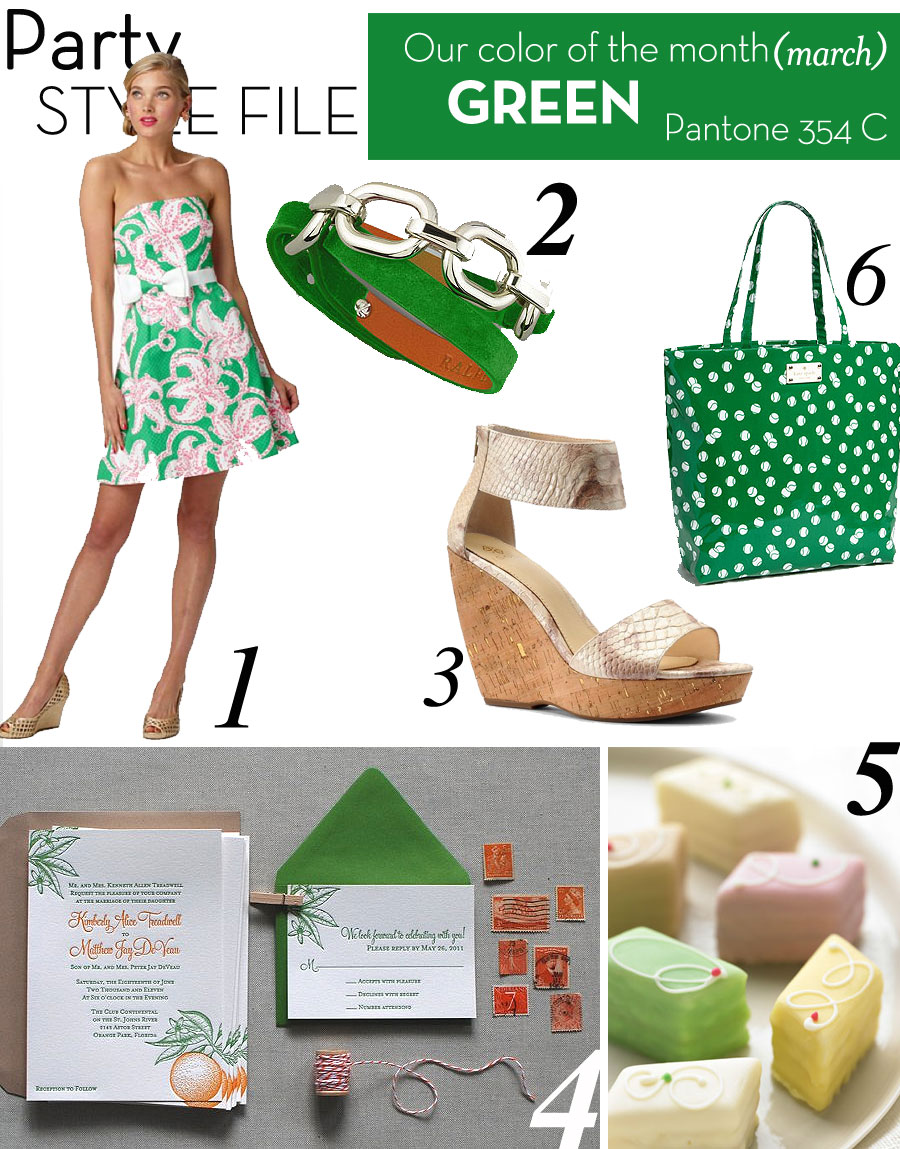
  1. Nothing says spring more than Amberly Dress $228

  2. Leave it to Ralph Lauren to make us turn green with envy! A must have this spring! Ralph Lauren
    Suede Wrap Bracelet, Green
    – $195

  3. If you had the Luck of the Irish, you would certainly smile finding this Isola Oasis Wedge Sandals at the end of the rainbow. Available at Macy’s $149

  4. Gorgeous invitation from The Aerialist Press

  5. Get your sweet tooth ready for these Pastel Petits Fours– $38

  6. Kate Spade New York ‘daycation’ coated canvas bon shopper– $148

A Great Easter With The Kids!

April 7th, 2012

Photography by Arina Lanis

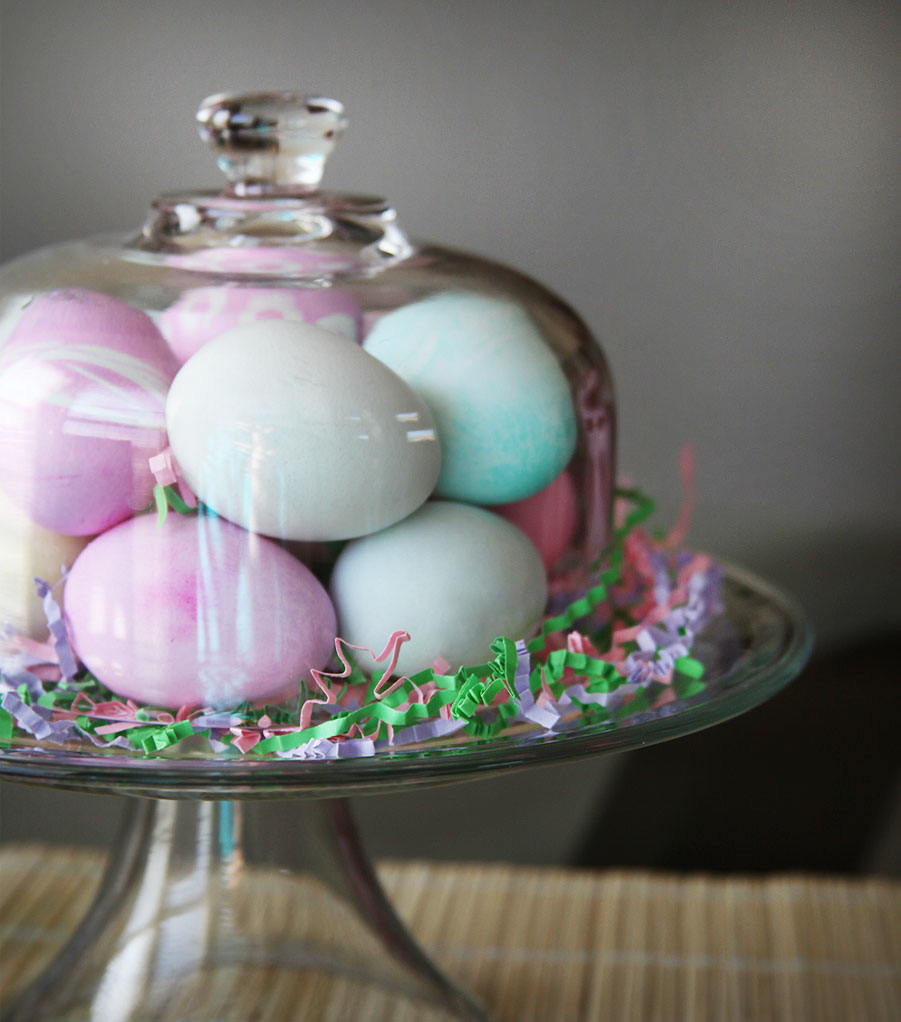
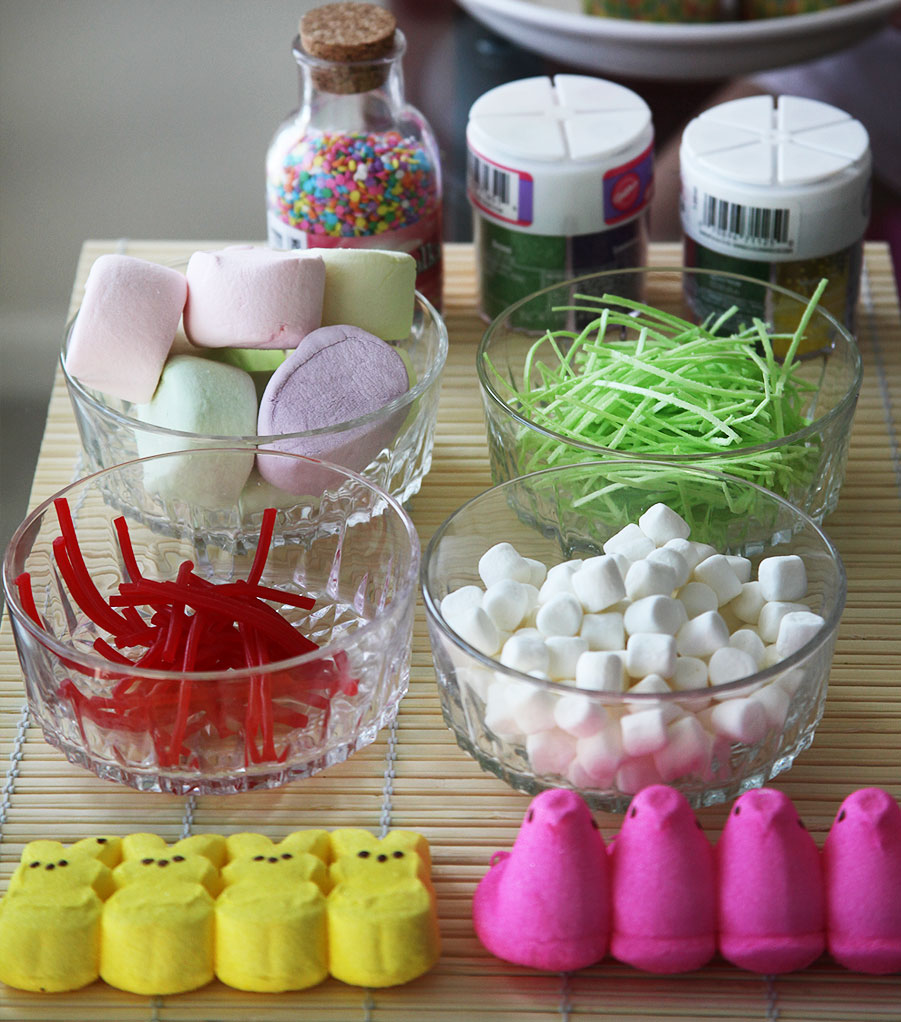
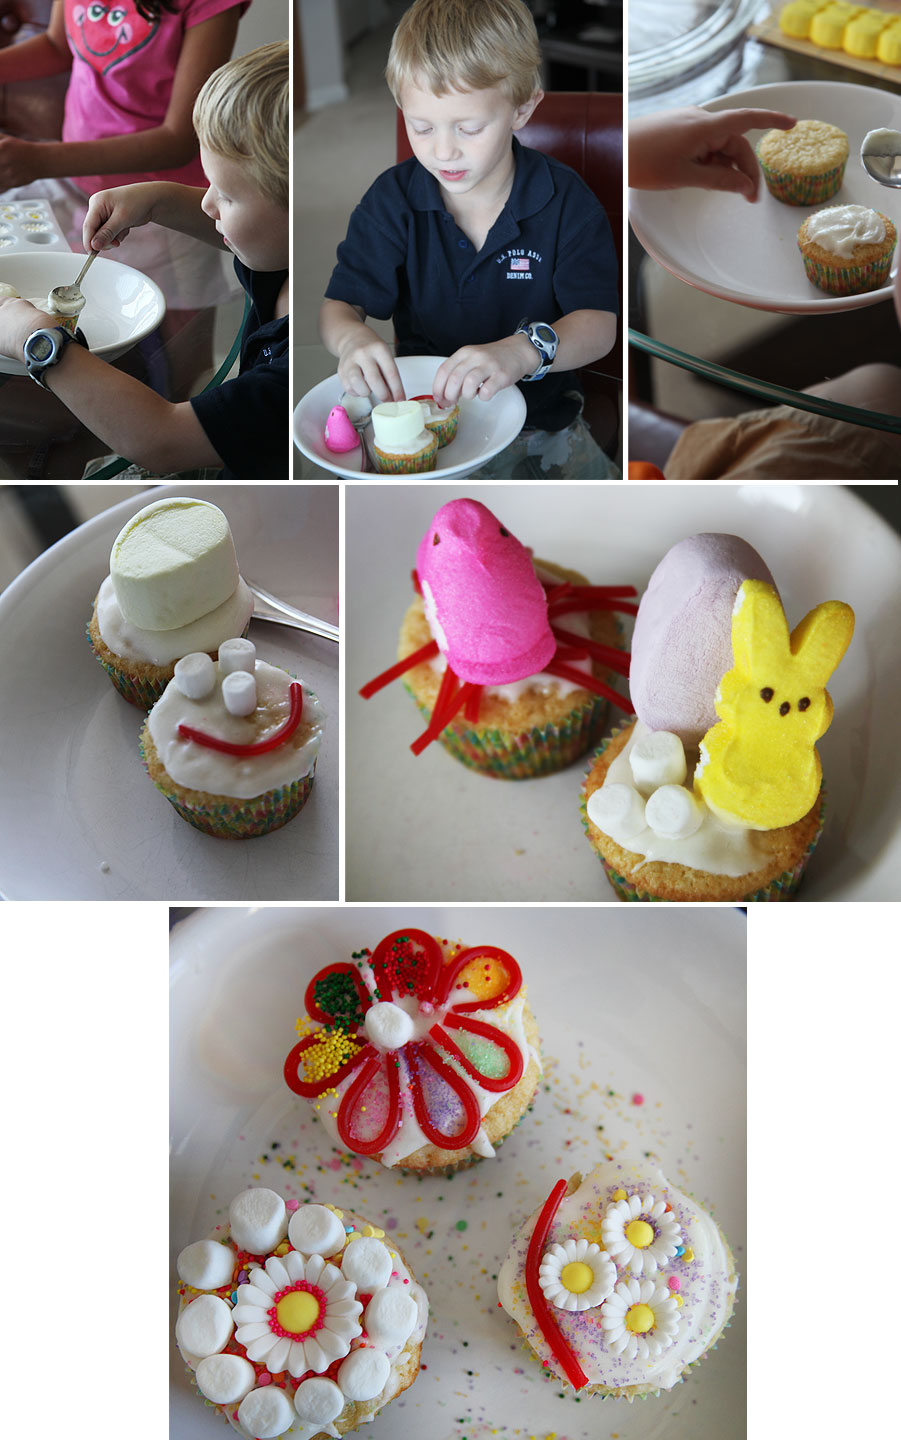
Easter is tomorrow and I decided to get my boys and one of their friends together to make some fun Easter eggs and decorate cupcakes.  I checked out Pinterest to get ideas for decorating and we decided to use rubber bands and paper hole punch protectors.  We may not have been very successful with creating perfect eggs and cupcakes but we were successful in having a fun time and creating wonderful memories.

Recipe of the Week – Watermelon Prosciutto + Cheese Appetizers

February 29th, 2012

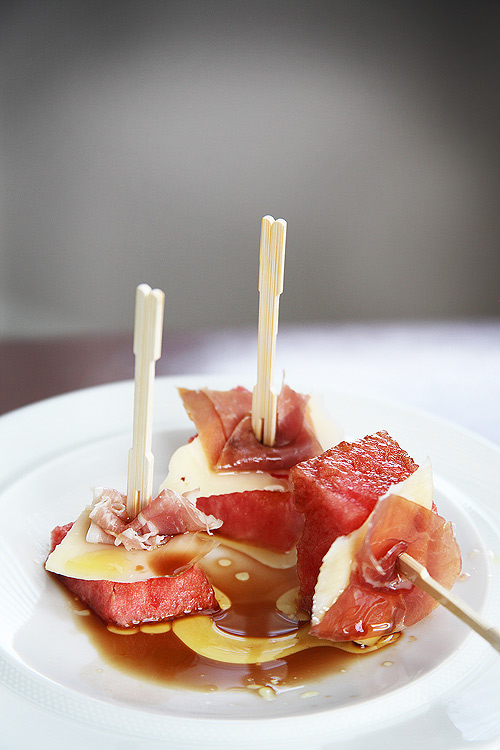
For anyone who’s anxious to serve something with a “twist”, this is a great summer appetizer to impress your guests. Instead of honeydew melon, we used watermelon and instead of feta cheese, which has become ubiquitous when it comes to pairing with watermelon, we used a strong Dutch Gouda. But you can use any cheese you enjoy. Feel free to experiment to find the right combination for you.

Ingredients
1/4 watermelon
4 thin slices of Prosciutto
8 thin slices of Gouda cheese (or a strong gourmet cheese of your choosing. You can use Feta as well)
Olive oil
Balsamic vinegar or a gourmet flavored vinegar

Preparation
Cube watermelon. Arrange individual cubes on a plate or serving platter. Cut each long slice of Prosciutto in to four pieces. Cut cheese into individual small pieces. Stack cheese and prosciutto on top of watermelon cubes. Sprinkle with olive oil and balsamic vinegar.

Recipe of the Week – Smoked Chicken and Cranberry Arugula Salad

February 23rd, 2012

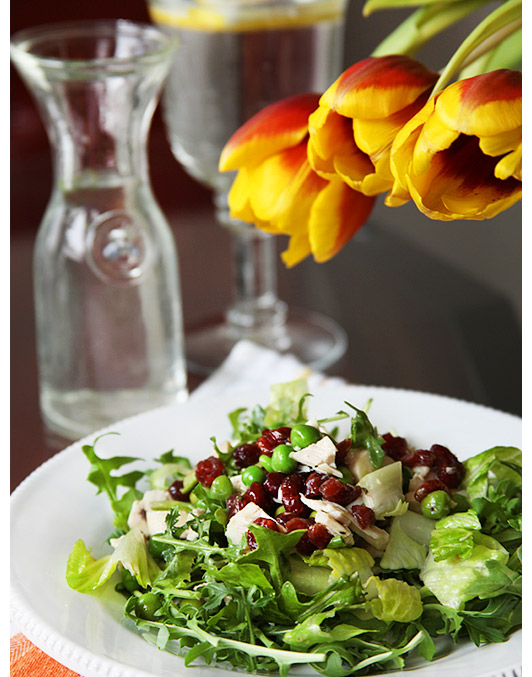
If you are looking for a salad that is easy to make, delicious, and filling, I’ve got one right here! This delicious, sweet, and tangy salad is easy to make and will definitely impress your friends. The smoked chicken is ready-made from the super market. I love the chicken from the rotisserie and it can easily feed 6 – 8 guests. Serve with a delicious herbed buttered bread, such as a Rosemary loaf and you will have very happy guests. The smells and tastes will truly impress!

Ingredients
1 medium smoked chicken (available at any grocery store)
1 cup dried cranberries
1 cup frozen peas
2 ripe avocados
1 lemon
1 head lettuce
1 bag arugula
To Make Dressing
3 tbsp olive oil
2 tbsp walnut oil
3 tbsp lemon juice
2 tbsp fresh mixed herbs (a mixture of fresh herbs such as parsley, lemon thyme, mint, etc.)
Salt and Pepper

Preparation
Divide and carve the chicken cutting to make bite sized pieces for the salad. Cover the divided and cut chicken and store in refrigerator.
Put the cranberries in a bowl of water and let stand, covered, for 30-45 minutes.

Meanwhile, blanche the frozen peas and refresh them under cold water.

Slice or cube the avocados and squeeze lemon juice on them to prevent discoloration.

Combine the lettuce and arugula and toss with avocados and peas. Add the chicken.

Combine all the dressing ingredients and shake well. Add salt and pepper to taste and shake well again until all the ingredients are well blended and taste the way you want.

Drain the cranberries and mix them with the dressing, then pour over salad and serve immediately.

Super Simple Centerpieces (I'm talkin' Duct Tape!) and Appetizer Display

February 20th, 2012

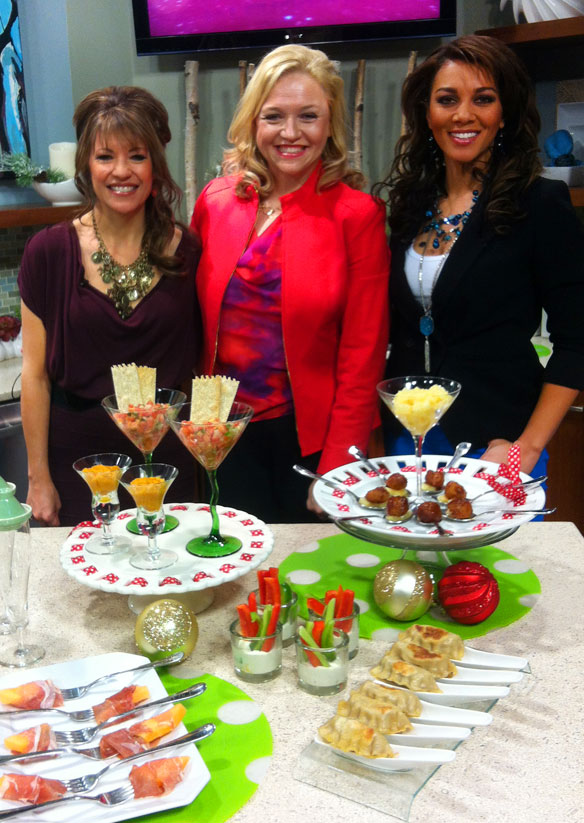
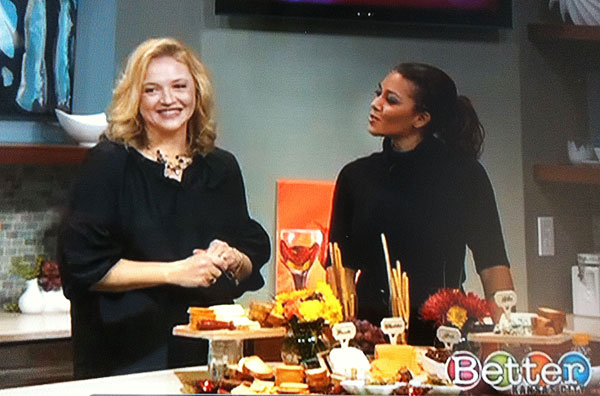
As always, I had a wonderful time ending 2012 with two segments on Better Kansas City TV show! The beautiful and classy  Lisa Holbrook, one of the hosts who interviewed me (on the left), always makes me feel special and welcomed.  The gorgeous and hip Kelly Jones (on the right), is the other host.  Kelly and Lisa make a great team and both make my time at Better Kansas City fun and memorable.

My two segments covered super easy centerpieces and creative ways to showcase your appetizers. Below are the tips for the centerpieces. I hope you enjoy them and if you would like to see the actual TV segments, I’ll be posting them soon on my  “videos”  page.  Or, you can see them directly on the KCTV 5 Web Site:

CREATIVE APPETIZERS VIDEO

SUPER SIMPLE CENTERPIECES USING DUCT TAPE, EMPTY BOXES, GIFT BOXES, AND CANDY

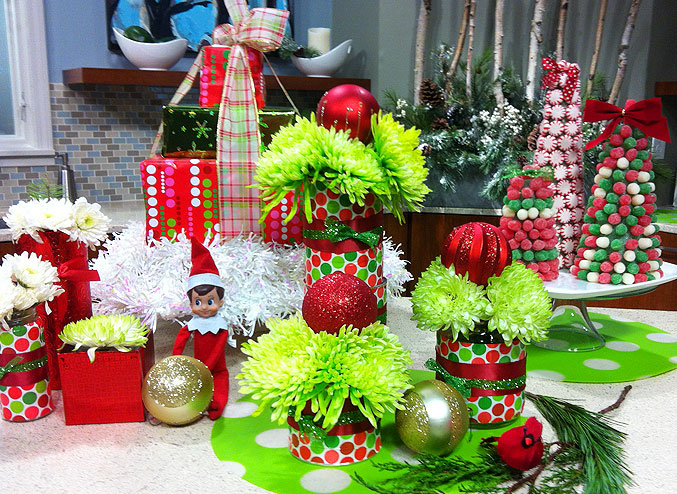
Stunning Christmas centerpieces don’t necessarily have to take a lot of time or expensive materials. If you are looking to create something budget friendly, yet creative, this holiday season, here are some great ideas on re-purposing things you may already have sitting around your house!

1. METAL CANS, JARS & DUCT TAPE : Before you throw out those coffee cans, veggie cans, or even pickle jars, STOP! Because now you can re-purpose them as fun containers for your holiday centerpiece. Simply purchase decorative duct tape at any craft store and cover your cans and jars. Before you know it, you’ll have a great centerpiece to wow your friends with!  I used polka-dot decorative duct tape.  I re-purposed used ribbon and tied it around the can.  I filled the cans with fresh flowers and set a red Christmas ornament on top.  It turned out great!

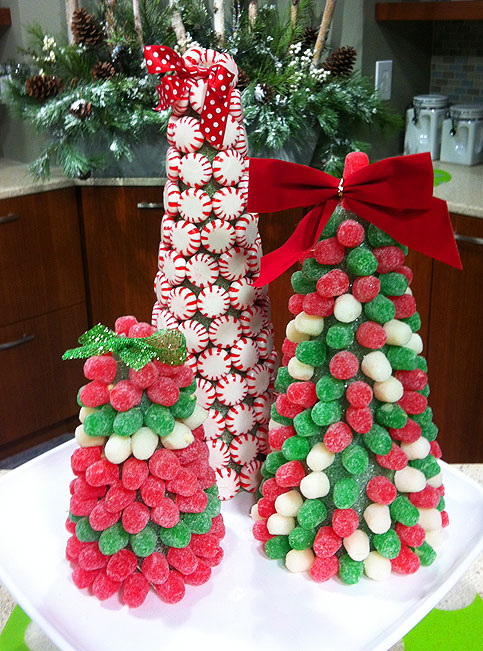
2. CANDY TOPIARIES: One of the many things we are tempted with during the holidays is the plethora of candy that
seems to pop-up from just about everywhere. Well, instead of watching your waistline grow, watch how impressed your friends and family will be when you create these fun and easy topiaries perfect for your table, buffet, or just about anywhere.  I used hot glue to adhere the peppermints.  I also used toothpicks for the gumdrop trees.  Both were super easy and I did them with my kids while watching a Christmas movie.


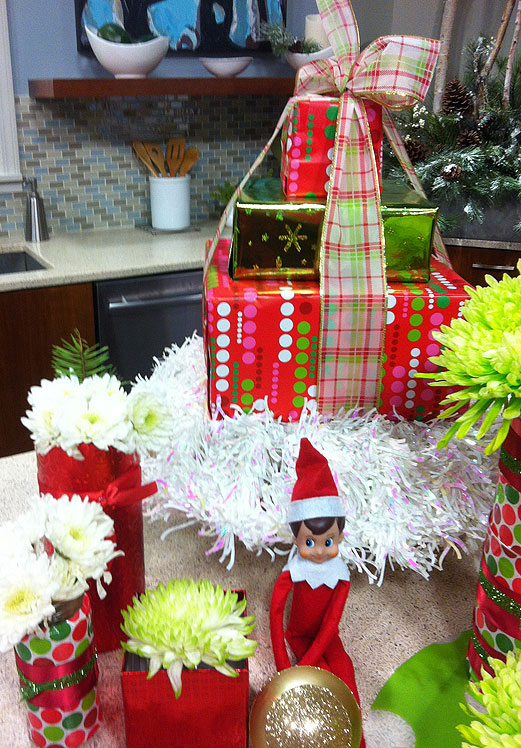
3. EMPTY BOXES: I don’t know about most people, but my house seems to get an inordinate amount of boxes during the
holidays. With a little creativity and help from wrapping paper, you can transform those boring old empty boxes into beautiful
displays perfect for anywhere in your home.


4. GIFT BAGS AND GIFT BOXES If you ever thought that vases were the only things you could put flowers in, you’re about
to be pleasantly surprised! These “ready-made” table decorations can transform a boring table into a beautiful showplace!

For those of you who know about Elf on A Shelf and wondered why he’s hanging out with me.  Well, it’s because he tagged along with me to the TV studio.  My kids wondered what happened to him in the morning since he was no where to be found.  But when they watched my  TV segment, they were so surprised and thrilled to find him in the midst of my centerpieces.

How To Create An Epic Cheese Platter!

February 17th, 2012

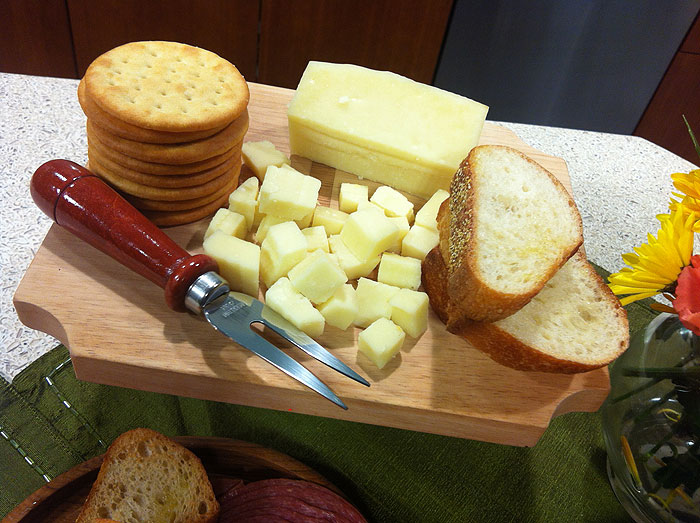
It’s always really exciting when I get to appear on Better Kansas City!  The hosts are fun and the crew always makes me feel like I’m among friends!  It was Kelly’s (one of the hosts) birthday the prior week and I wanted to create something special for her to celebrate her belated birthday!  What better way to do that than with a cheese spread?  Lucky for me, the producer agreed that since the holidays were just around the corner, most watchers would probably appreciate a “how-to create a cheese platter 101”.  So, equipped with my “no-fail” tried and true tips, I arrived at the studio with tons of cheese, accessories, and a slew of ideas.
Many people wonder where to start when planning your cheese platter.  I’m certainly no cheese expert but the good news is that creating a cheese presentation is basically a “no-fail” endeavor.  As long as you have cheese and crackers, your guests will be happy.  However, if you want to take it to the next level, there are many things you can do to create something unforgettable.   I’ve done my research on the internet and also met with a “Cheese Steward” at a local store who gave me some great advice.  So, here’s what I learned:

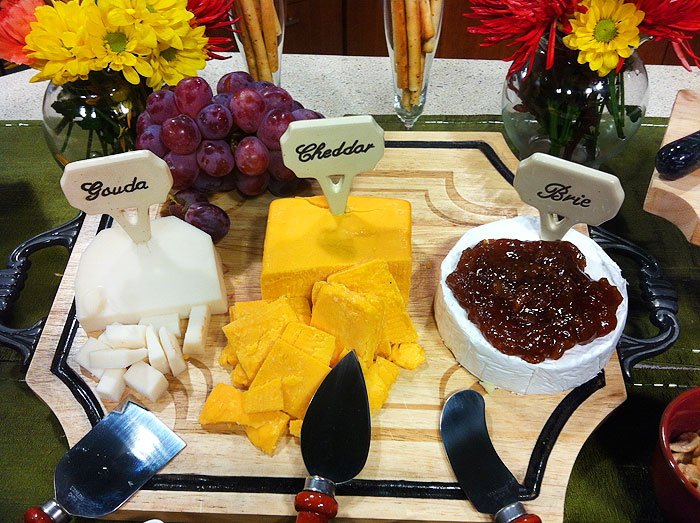
TIP #1 – Try to have at least three milk types (cow, sheep, and goat).  Also, try to incorporate cheeses from different countries or regions.  For example, I had sheep cheese from Spain, goat cheese from Holland, and cow cheese from the United States.

TIP #2 – Have fun with the presentation!  Don’t worry about arranging things on special cheese platters. Simply using cutting boards… large and small… will create a warm setting that is not only practical but beautiful as well!  Additionally, don’t ever feel like you have to buy fancy equipment or presentation items.  Cheese is all about being casual and rustic… nothing fancy-schmancy about it!

TIP #3 – Have a different knife for each cheese.  There are few strict rules in cheese presentation, but having a knife dedicated strictly to each cheese is one of them.  No one wants a hunk of bleu cheese intruding on their cheddar.
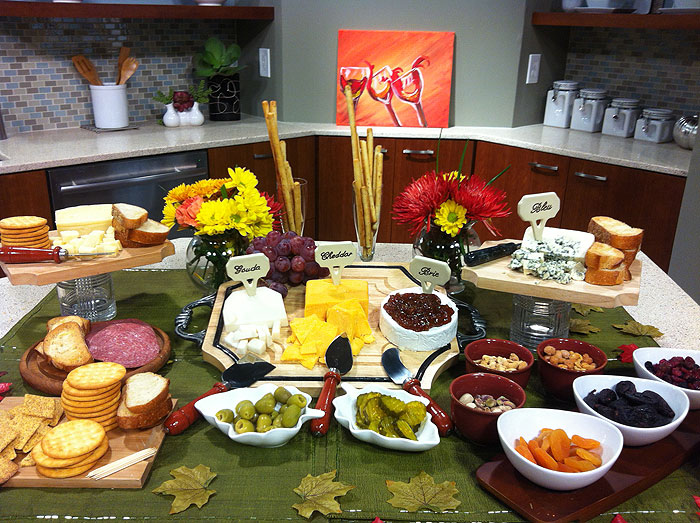
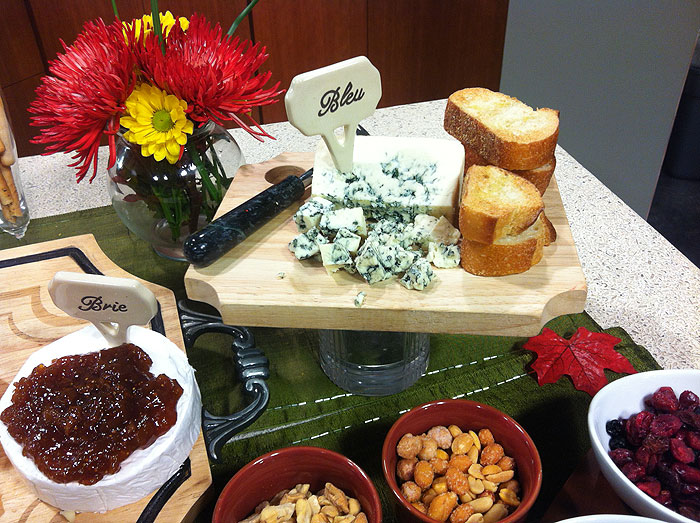
TIP #4 – Label, label, label!  Another rule not to break is to make sure your cheeses are well labeled.  Unless you plan to be next to your cheese plate all evening, ready to go into explanations with every guest, there should be a label next to each cheese.  The reasons are pretty obvious.  Some people may not be able to tolerate cow cheese, but can enjoy sheep or goat cheese.  And no matter how obvious some cheeses look, there are always people who have no idea which is the brie or the bleu cheese.  So do your guests and yourself a favor — label… label… label!

TIP #5 – Arrange the cheese.  Although this is not a die-hard rule, most cheese afficiandos will tell you that when placing multiple cheeses on a circular tray, place the cheeses in a clockwise direction starting from the mildest at the twelve o’clock position to the strongest, like your bleu cheese,  at eleven o’clock.  When arranging on a rectangular board, start with the mildest flavors on the right and work your way toward the strongest cheeses on the left.  Again, no one will call the cheese police if you don’t follow these rules, but you may impress the cheese afficionados.
TIP #6 – Don’t spend a ton of money on crackers!  Most people think that crackers have to be fancy or gourmet to serve with cheese, but the truth is, your cheese should be  your main investment.  Gourmet crackers are not a “must”.  In fact, most cheese experts recommend you stay with neutral crackers with no herbs or additional flavorings.  The important thing is to make sure the seasonings on the crackers do not interfere with the taste of the cheeses.  So save your money!

TIP #7 – Take care of your cheese!  Put your cheese out an hour prior to serving so it has a chance to soften.  Keep cheeses covered during the party so they don’t dry out.  When putting leftover cheese away, wrap in wax or parchment paper to let the cheese “breathe”.  Store in the most humid section of your refrigerator, which tends to be the vegetable drawer.

TIP #8 – It’s all about the pairings!  Even though cheese and crackers are great together, adding additional items to the cheese plate is not only delicious, but gives guests a sense of variety.  Here are some suggestions for pairing cheese.

1.  Artisan breads are wonderful for practically any cheese.  Soft breads and crusty toasts will work with mild, strong, soft, and hard cheeses.

2.  You can’t go wrong with fruit!  Fresh or dried, fruit is a wonderful accompaniment to any cheese.  Choose fruits that are in season and arrange them to create a colorful presentation.  Fresh apples, pears, grapes, kiwi, and pomegranate look beautiful together.  Dried figs, apricots, and cranberries are perfect to serve on a cold winter evening alongside your gourmet cheeses.
3.  Dried meats such as prosciutto, salami, and sopresetta are perfect next to sheep cheeses.  Place small crocks of mustard and horseradish nearby so guests can create small sandwiches with their meat and cheese pairings.

4.  Don’t forget the nuts!  Nuts and cheeses go hand in hand.  You don’t have to spend oodles on gourmet nuts.  Simple nuts such as walnuts, almonds, cashews, and even peanuts work well with cheese.  There are even hybrid nuts which are made especially for cheese pairings.
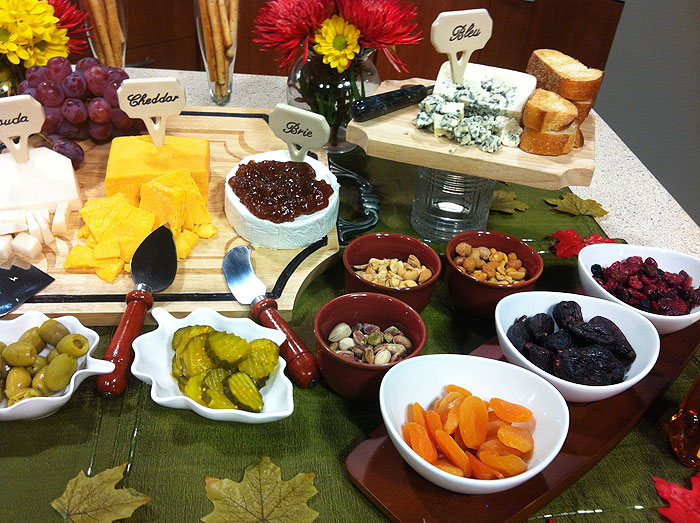
5.  The sweet stuff!  Did you know that drizzling honey over your bleu cheddar cheeses is DELICIOUS! Try it!  Your guests will also be surprised.  Other items like fig spread over brie is absolutely unforgettable.  Great for an after-dinner cheese spread as well!

6.  Pickled anything!  Some of my most favorite pairings are pickles and even olives! They go great with mild or strong cheddar.  Place some pickles or olives next to your cheddar and watch them disappear!

Pumpkin Patch Hummus and Carrot Appetizer

February 15th, 2012

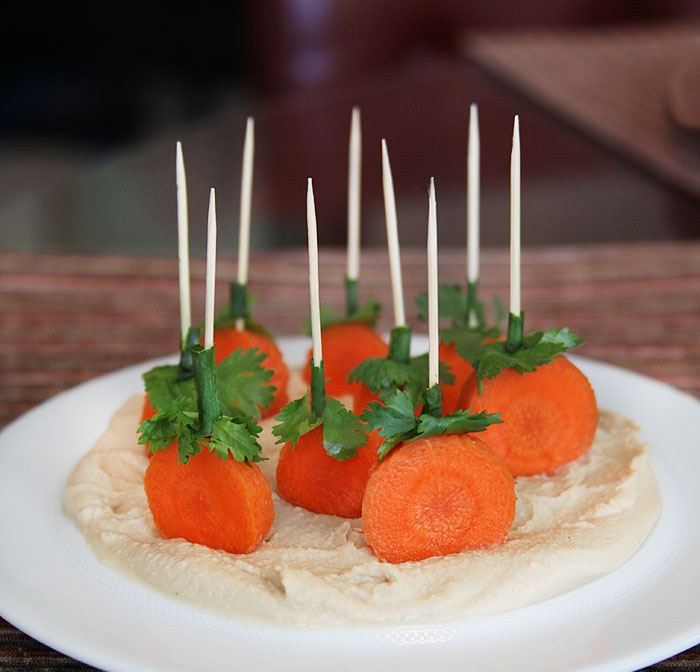
Seriously, how can you not fall in love with this great idea for an appetizer. It’s easy to put together and fun for guests to nibble on. All you need are carrots, parsley, green onion, toothpicks, and hummus.

Then, just slice the carrots, take some parsley leaves and attach them to the carrot with a toothpick. Slide a piece of green onion over the toothpick to have a look of a “stem” and arrange on a bed of hummus. Told ya it was simple!

Thanks to the folks at Disney magazine for inspiring me with this recipe.