April 14th, 2014
I was inspired by a similar recipe off a Manischewitz Matzah box. I’m not sure if this is Kosher for Passover, but if you’ve never had Matzah / Matzo before, and you are not keeping kosher, this is a great way to enjoy it! If you need this to be Kosher, I would do a little more research or ask your Rabbi if modifications need to be made. I did read that they sell kosher for Passover caramel, as well as chocolate. Someone told me that “Kosher” and “Kosher for Passover” may be different. The Cool Whip tub does have the circle K on it, to say that it’s Kosher, but I don’t know if it’s kosher for Passover. My goal with this recipe was to have my friends, who are not Jewish, try Matzah / Matzo for the first time, so keeping kosher was not the goal. I also think this is one of those “surprise” desserts which can be eaten year round and the fact that it is made out of Matzo is the best part!!
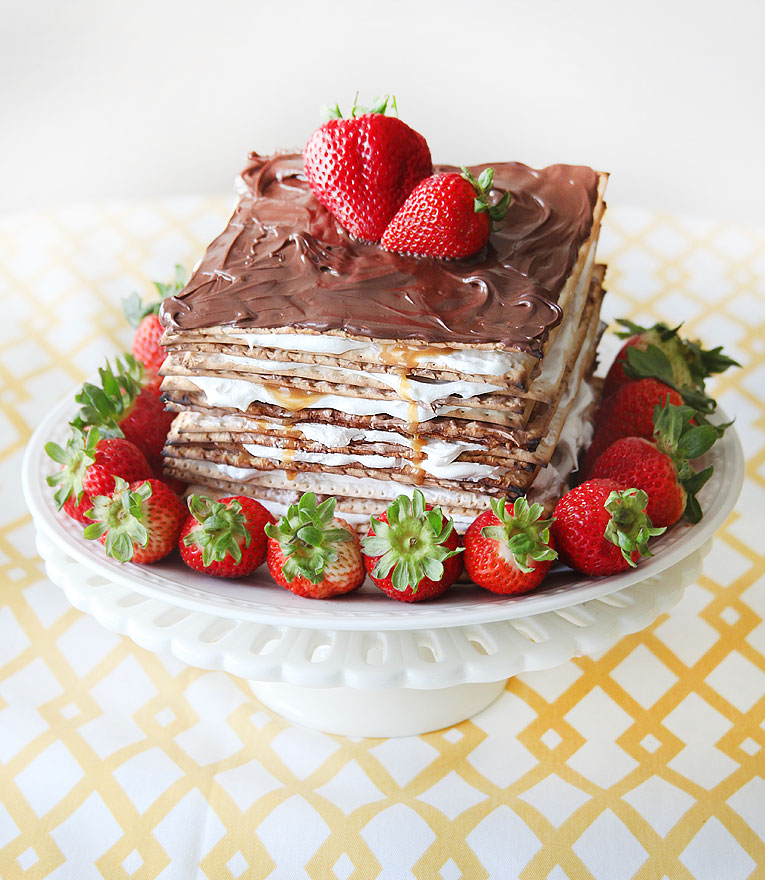
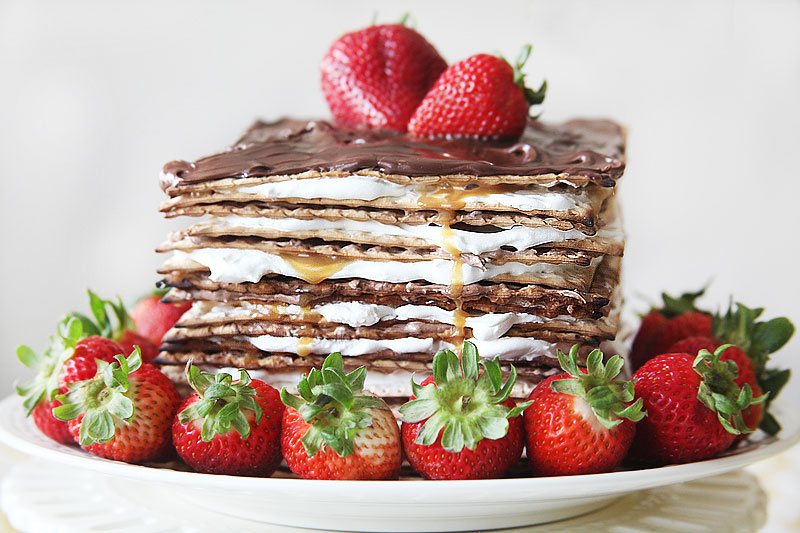
MATZO / MATZAH CAKE
2 pkgs Matzo / Matzah
1 extra large tub – Cool Whip
1 bag of crushed or slivered almonds
1-2 bags dark chocolate bars or chips
1 jar caramel (you can purchase the kosher variety available on-line)
1 bottle of grape juice or wine
Melt the chocolate bars/chips in a double boiler. In a bowl, empty out some of the melted chocolate and fold in 1/2 the tub of the cool whip. Keep folding until most of the chocolate is mixed in with the cool whip. You can play with the amount of chocolate by your preference. Add more chocolate for a chocolatier taste and less for less chocolate. This process doesn’t create a very smooth spread, but, once you spread it on the matzo and cover it up with another matzo, no one will actually see the cool whip and chocolate spread. Reserve the other 1/2 tub of cool whip for your layering.
Place a pile of matzo in a container and pour wine or grape juice over it. Give it about 15-35 seconds to soak in.
It’s time to layer. Take your matzo (which has been soaking in the wine/grape juice for 15-35 seconds) and spread the chocolate/cool whip frosting on top. Sprinkle some almonds on the frosting. Place another matzo on top and spread just cool whip on it. Take your caramel and pour a few drops on the corners and in the middle of the second layer. Place another matzo on top and repeat with the chocolate cool whip mixture with the almonds. Repeat with the plain cool whip and caramel. Continue with these steps until you have reached your desired height. On the very top matzo, spread just the melted chocolate and top off with a couple of strawberries.
Your last step is to refrigerate the matzo cake for at least 4 hours. I actually had mine in the refrigerator for 24 hours and it came out great. In fact, we even ate it 2 days after I made it and it was still delicious!!
For impact, I surrounded my matzo cake with strawberries. But you can do raspberries, or any fruit!
· Posted in Guilt Free Party Snacks, Parties, Passover, Recipes ·
March 31st, 2014
I am absolutely in love with this recipe! It is perfect in every way! I love that people who are watching their carbs can enjoy this. As a low carb eater, I find it hard, at some parties, to find items I can enjoy. However, now you can create a beautiful appetizer without having to worry about your carb count. If you don’t like endives, this recipe is great as a side dish as well!!!
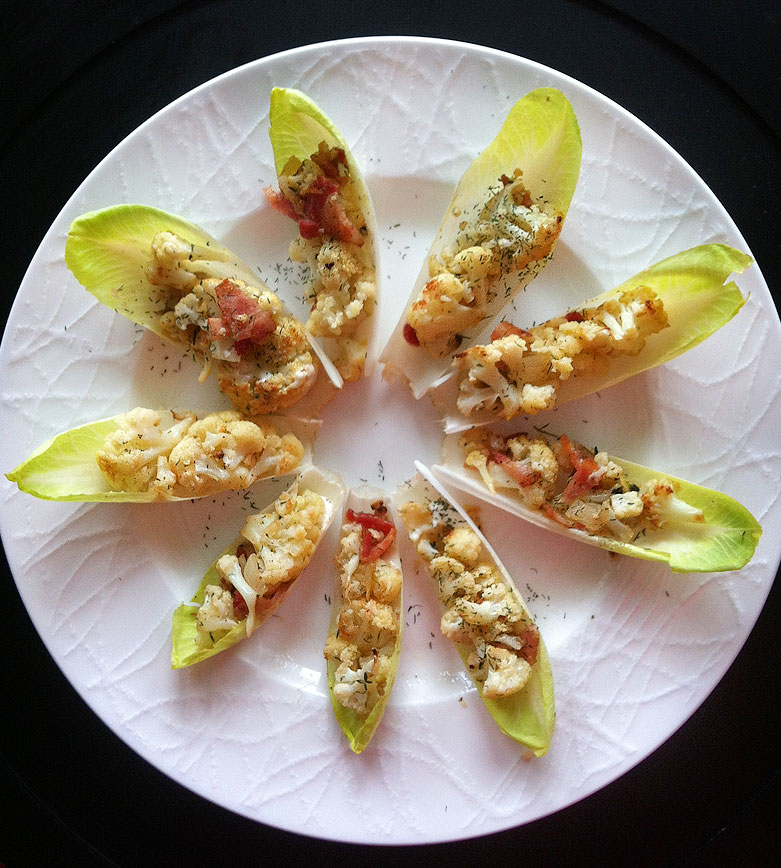
CAULIFLOWER AND BACON BOATS
1 Head of Cauliflower
5 Strips of Bacon
1/4 -1/2 cup of chopped onion
3 Garlic Cloves – chopped
1 Tbsp of your favorite fresh herbs
1 Tbsp nutmeg
1/2 stick of butter of 1/4 cup of olive oil
Juice of 2 lemons
1 Tsp of lemon zest
salt and pepper to taste
1 endive
2 Tbsp of your favorite salad dressing (I love ranch)
Cut the cauliflower into small pieces and toss with olive oil, salt and pepper. Arrange on a baking pan and roast in your oven for 15-20 minutes or until the cauliflower becomes tender. Once the cauliflower is done, heat butter or olive oil in a pan and saute the onions and garlic. Throw in the bacon and continue until its ready. For the last step, add the cauliflower to the mixture in the pan and add lemon juice, lemon zest, nutmeg, herbs, and salt and pepper. Arrange the endive leaves on a plate and add a drop or two of your favorite dressing. Fill with the cauliflower mixture. Sprinkle dried chives, or any herb you adore and serve immediately.
The cauliflower mixture can also be prepared a day ahead! Or served as a side dish without the endive boats.
· Posted in Appetizers, Guilt Free Party Snacks, Low Carb, Parties, Recipes ·
March 17th, 2014
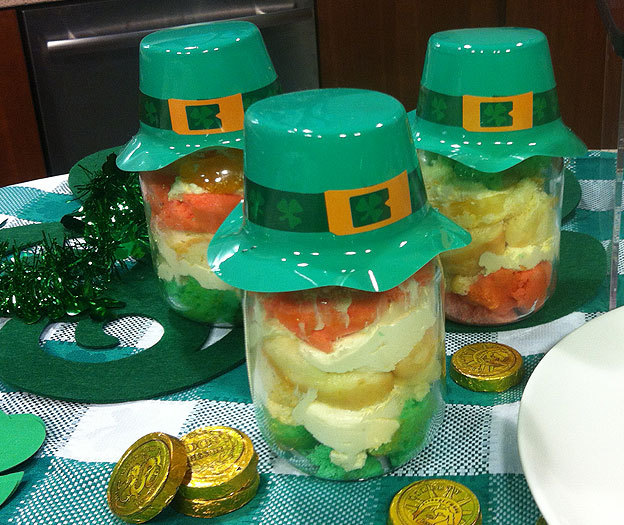
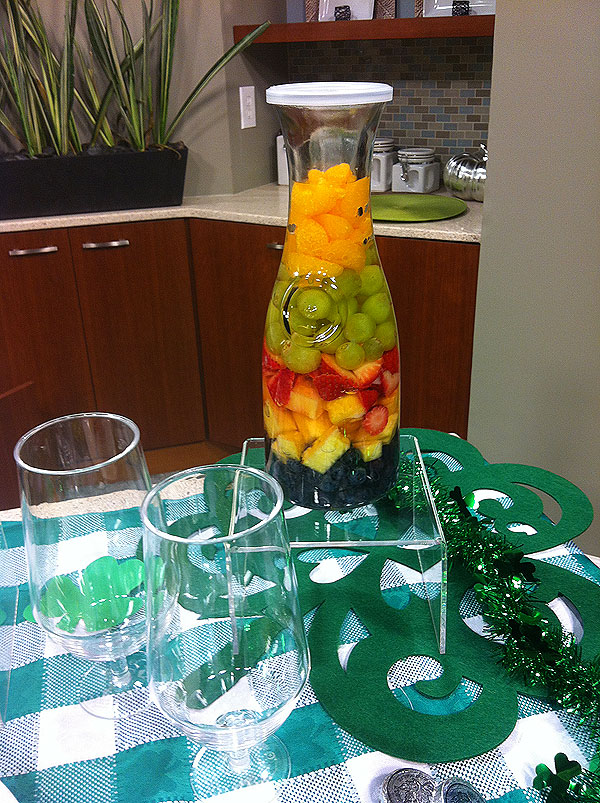
I had a great time on Better Kansas City showcasing some super easy recipes for St. Patrick’s Day. My favorite, has to be the Rainbow Sangria! All of the recipes are available in our “recipes” section and I also included links.
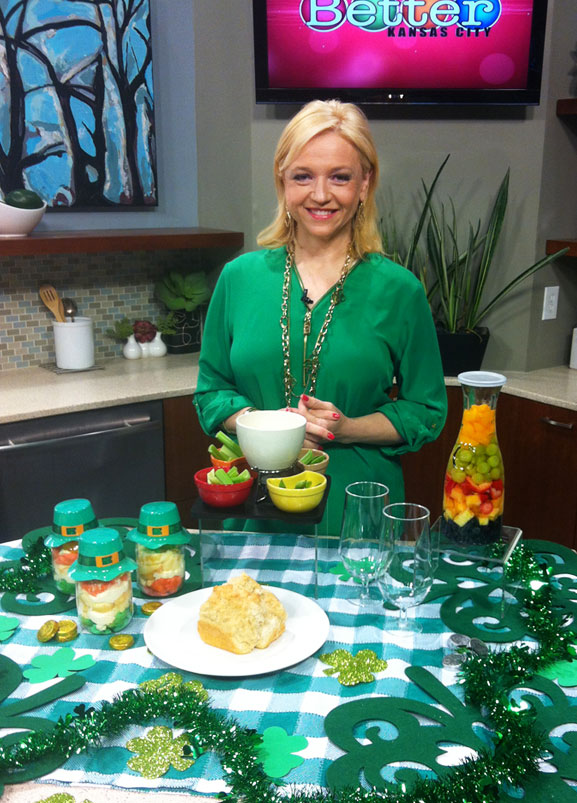
IRISH FLAG TRIFLE
RAINBOW SANGRAIA
· Posted in Parties, Recipes, St. Patrick's Day, TV Appearances, TV Spots ·
February 5th, 2014
Today my boys and I had a snow day and decided to make something from my 5th grader’s history text book. there was a recipe for Bannock bread so we thought we would go for it! This was a bread that the pilgrims made during colonial times. Our recipe was made out of cornmeal but there are a number of different kinds which include regular flower and yeast. I have to say, I don’t use cornmeal a lot since we try to limit our carb intake. However, I thought… why not?! It turned out surprisingly good and we coupled the cakes with low-sodium turkey sausages. The boys really liked them and had a very filling lunch on a cold snowy day. We even left a few for my husband who will be enjoying them with the leftover chili from Super Bowl Sunday. Here’s the recipe, in case you are interested! A great bread to make with your kids.
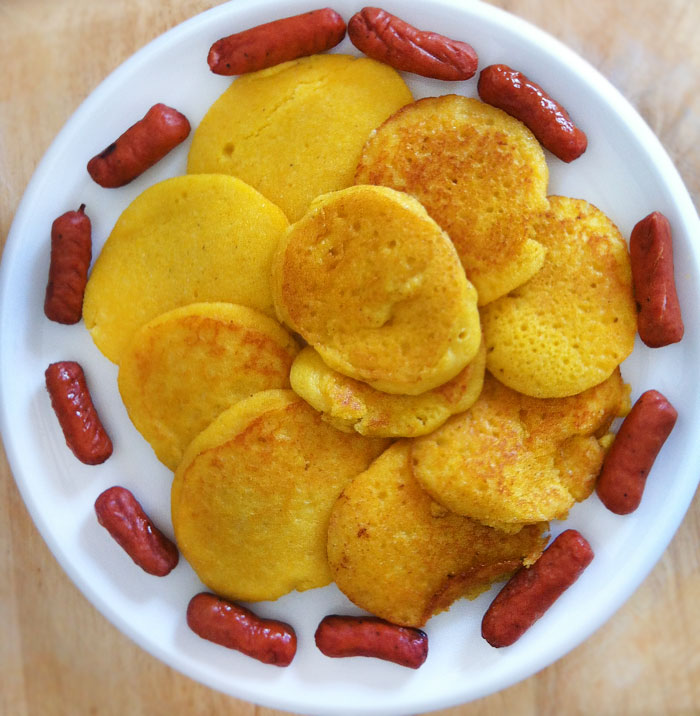
INGREDIENTS
1 cup water
1 cup cornmeal
1/2 tsp salt
1/2 cup of milk
1 egg
2 tbsp butter
PREPARATION
1) Bring water to a boil.
2) In another bowl, mix cornmeal and salt together. Add boiling water and stir with spoon until smooth. Sir in milk. Let batter sit 5 minutes and then add egg and mix.
3) Melt butter in a frying pan over medium heat. Use a spoon or small ladle to drop the batter on to the pan and cook until golden brown. Flip and cook other side. Serve hot or cold.
· Posted in Recipes, Thanksgiving ·
January 27th, 2014
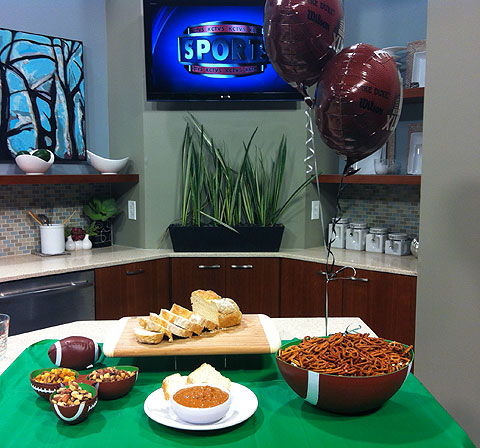
I had a blast today hanging out with Alexis and Dave from Better Kansas City Morning Show on Channel 4, here in Kansas City! I demoed three great “mobile” snacks to take to a Super Bowl party. Hot Wing Pretzels… Roasted Flavored Nuts… and Hot Wing Pretzels! All were super easy and with just a few ingredients!

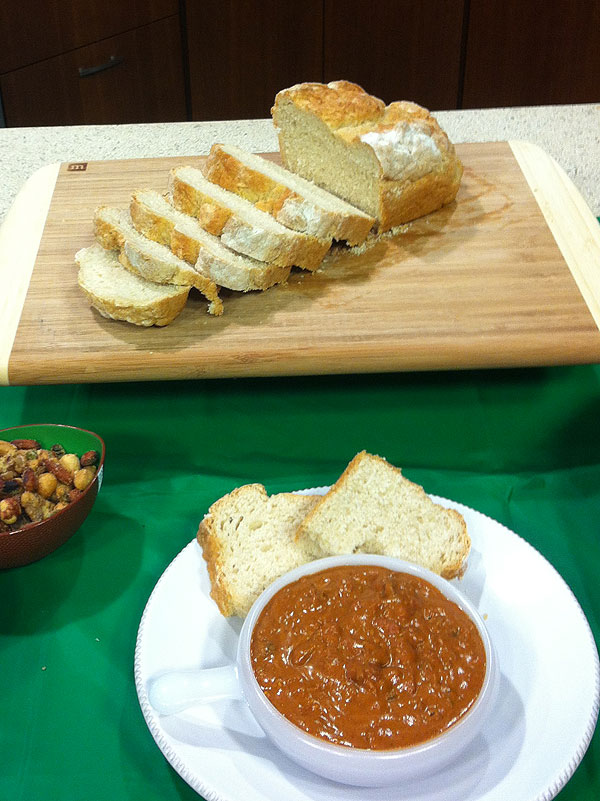
BEER BREAD
3 cups of Self Rising (very important!) flour
3 tabspoons of sugar
12oz container of beer (any brand)
Pour beer into bowl. Then add flour and sugar. Mix until you have a dough
that is not sticking to the sides (you can add a little extra flour if you
like). You can place the dough directly in a well greased loaf pan. Or,
you can put the dough on a floured surface and knead it until you like the
consistency. Either way, your bread will be perfect (kneading or no
kneading).
Bake in the oven at 350 degrees for 55 minutes or until you see the top of
the bread get brown. Keep an eye on your bread because ovens can bake
differently. If you like, you can pour some melted button on the top of the
bread 10-15 minutes before it is done.
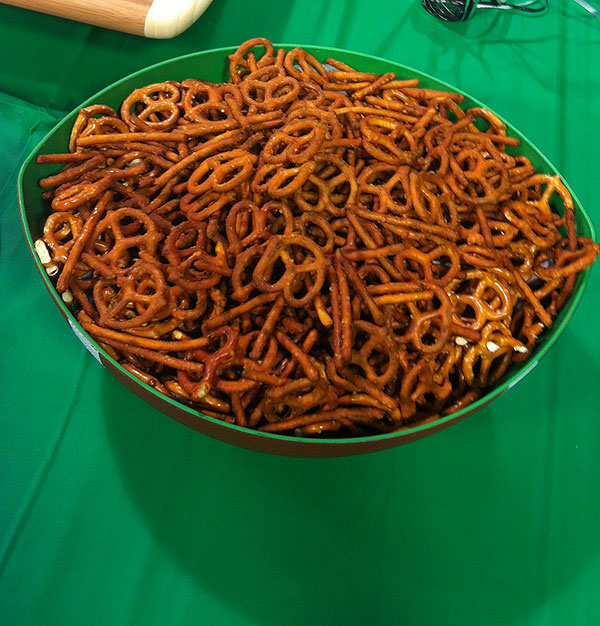
HOT WING PRETZELS
1 bag of pretzel sticks or regular pretzels. Do not use large pretzel
sticks.
1/2 cup of Butter
1/2 cup of Hot Wing Sauce
2 Tbsp of Worcestershire Sauce
2 tsp Garlic Salt
In a pot, heat up the sauces and garlic salt. Once everything is mixed and
well heated, place the pretzels in a bowl and coat with hot sauce mixture.
Make sure that you coat the pretzels little by little, you don’t want there
to be extra sauce on the bottom of the bowl or a puddle on your baking sheet. Mix the pretzel sticks so they are well coated. Then place on a baking pan and bake on 300 degrees for 30
minutes, stirring every 10 minutes.

SEASONED NUTS
3 cups of any nuts or mixed nuts… make sure they are RAW!
1/4 – 1/2 cup of butter
Ranch, cheese, or any pop-corn seasoning. You can also use seasoning packs
made for salsas and dips.
Place your nuts in a bowl. Melt butter and pour it over nuts little by little. Mix well
until all nuts are coated. Then simply add your favorite seasoning… as
much as you like. Bake in the oven at 350 degrees for 7-10 minutes. KEEP
YOUR EYE ON THE NUTS SO THAT THEY DO NOT BURN!! After nuts are taken out of
the oven, sprinkle some more seasoning on them and wait for them to dry
fully 3-5 hours. Great to make a day in advance.
· Posted in Appetizers, Parties, Recipes, Super Bowl, TV Appearances, TV Spots, Uncategorized ·
October 28th, 2013
Get your napkins ready, because if you make this gooey and yummy dessert, your guests will be licking their fingers for hours! These brownies is supposed to look as if the PEEPS are melting all over it. And it just doesn’t get any easier.
Just purchase basic brownie mix at your local grocery store. Five minutes before the brownies are done, sprinkle with a layer of mini-marshmallows. In about 5-7 minutes, your brownies should be ready and a puffy layer of marshmallows will create a beautiful topping. Once it cools, cut the brownies into squares, and with a toothpick, attach a PEEPS ghost. The white of the PEEPS and the white of the marshmallow layer will look like the Peep is melting directly into the marshmallow and creates a fabulous effect. 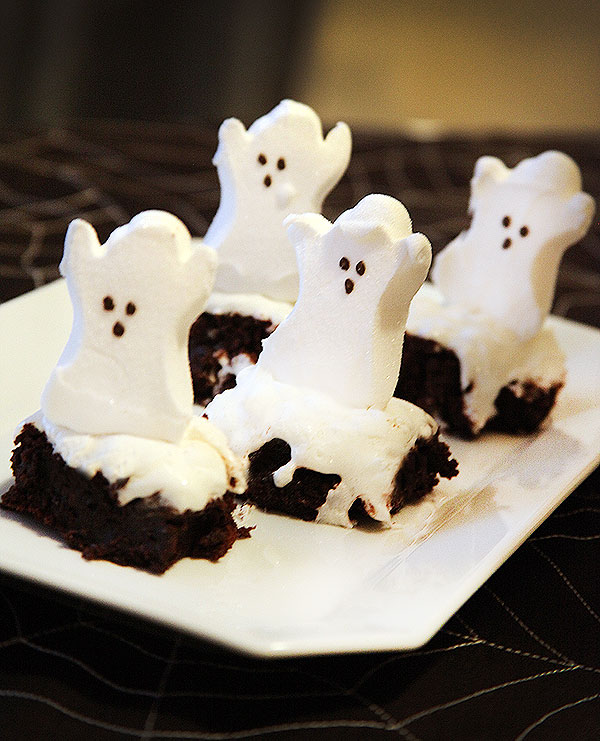
· Posted in Halloween, PEEPS, Recipes ·
October 24th, 2013
What is Halloween without “witches” or “monster” fingers… clearly, they are a staple at any Halloween party! I guess this is why there is no shortage of witches’ fingers on the web, just google it and you will find a myriad of recipes… some made out of cookies, others out of breadsticks, I can go on and on.
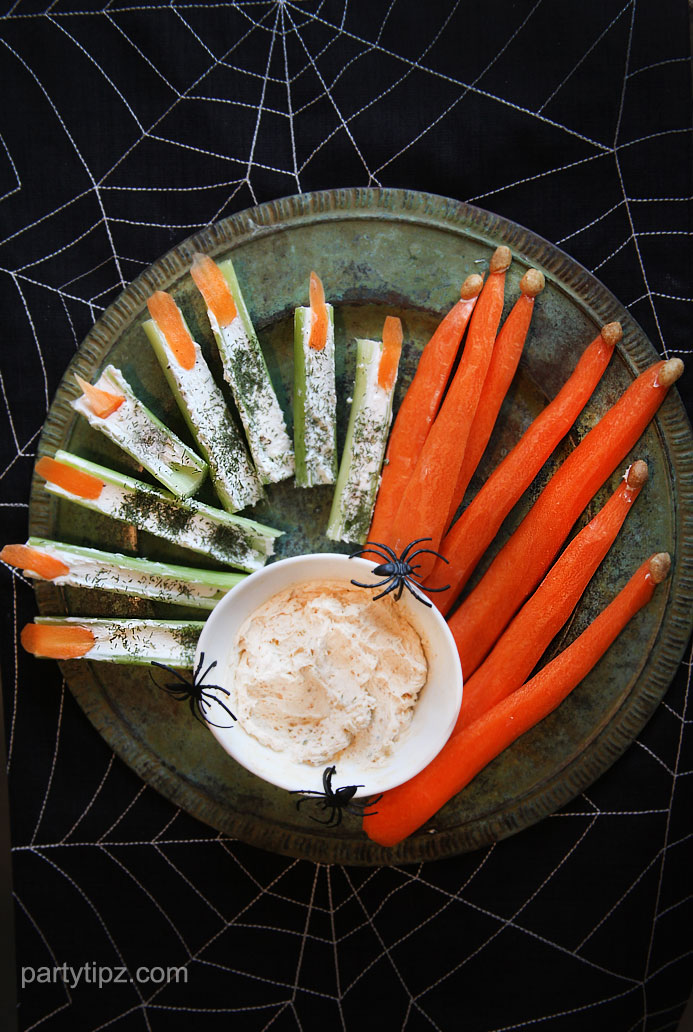
I too have come up with several “finger” recipes to add to the creative pool! Just couldn’t resist! Since my other recipes included hot dogs and cookie dough (two separate recipes… thankfully) , I thought I would contribute one more recipe which was a little more health conscious… much like a veggie platter! These monster fingers are made out of carrots and celery.
You can get really creative with the carrots when you are peeling them, making them gnarly and uneven. Use peanuts or almonds for the “nails”. There isn’t much room for creativity with the celery, but you can have some fun with the nails by making them more pointy or curly. I created a “hairy finger look” by sprinkling the celery with dill weed. Oh and the best part, they can be as ugly as you want them to be… perfection is a “no-no” with this recipe, so throw it out the window and enjoy the process.
For the filling of the celery, I used flavored cream cheese and sprinkled the top with dill weed for a “hairy” look. The nails are thinly sliced carrots. For the carrots, I simply peeled them and adhered a peanut for a gnarly nail with the cream cheese. Serve them with any dip or flavored cream cheese.
· Posted in Halloween, Parties, Recipes ·
October 11th, 2013
Yes, yes, I know it’s gross… but it’s Halloween… right??? And as your kids will get older, fun cupcakes, gummy worms, and cute Halloween popsicles, just won’t do anymore! This year, my 10 year old and I came up with “Severed fingers in a bun”. We saw so many “finger foods” on Pinterest, that we thought we would try something ourselves. If this is something you think your kids or teenagers would like for Halloween, it’s probably the easiest thing we’ve ever done! Just prepare hot dogs as you normally would, then cut out s thin section to look like a nail bed. Then, make a few cuts with a knife to represent the knuckles. Last but not least, place the hot dogs in a bun already doused with ketchup. It’s even grosser if you decide to grill the hot dogs… need I say more?

· Posted in Halloween, Recipes, Uncategorized ·
September 29th, 2013
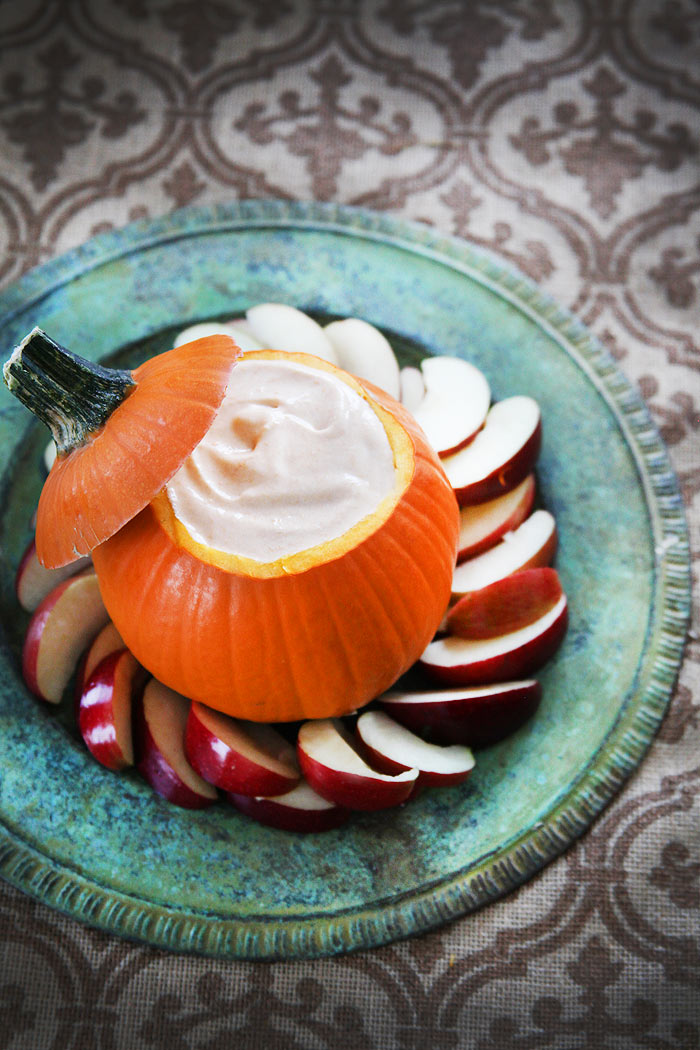
I LOVE this pumpkin dip… why? Because I can control how much sugar goes into it and customize it. So many recipes have multiple sweet ingredients which makes the sugar content difficult to gage. With this recipe, I can add as much or as little sugar as I want. Serve the dip with fruit, or even baked tortilla chips sprinkled with cinnamon and you’ve got yourself a winning party dish for any fall party… year after year. You’ll love it!
RECIPE
1/2 cup Canned Pumpkin (you can add less or more, depending on your preference)
1/2 large container of Light and Fit vanilla yogurt
2/3 container of Sugar Free Cool Whip (or any sugar free whipped topping)
1/2 cup of Sugar (this is the part that you can customize based on how sweet you would like it… you can use less or more)
1 tsp of Cinnamon (optional)
Combine all the ingredients and put in a bowl (or a hollowed out small pumpkin), I use sugar free and “light” varieties because I like to see how much sugar I’m putting in the dip. If this doesn’t matter to you, you can get the sugared varieties and skip adding your own sugar. Chill for at least 1 hour and serve with apples or sweet crackers.
· Posted in Appetizers, Fall Season, Guilt Free Party Snacks, Recipes, Thanksgiving ·
December 31st, 2012
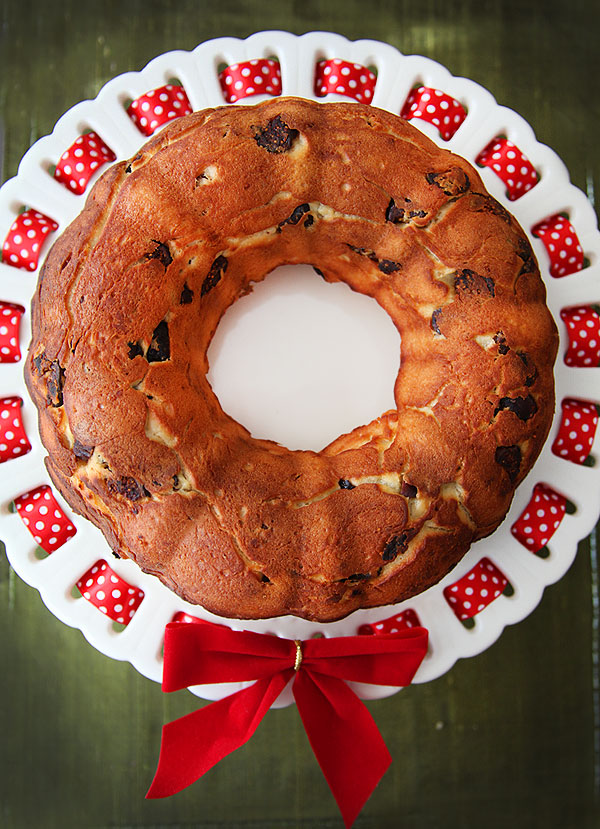
Here is a delicious Babka cake I made a few days ago. After doing some research on the MANY different varieties and recipes for this fabulous cake, I found the best recipe on Cooks.com. I also played around with a wonderful recipe in one of my cook books but it used shortening as well as asked that you let the dough rise for 6 hours. I hate shortening and am always short on time!
Note to all who are in a time crunch. This would NOT be the bread/cake for you! This is one of those “old school” European recipes where you have to assume that the people who made this, spent the entire day in the kitchen making a plethora of other food for hours and hours! For instance, you have to knead the dough for 1/2 hour by hand and as I mentioned above, let it rise for 6 hours!
So I cheated a little bit. I found a great recipe on cooks.com which used butter and only required that you let the dough rise for about 2 hours. This recipe also asks you to knead the dough, by hand, for 1/2 hour, but I only did it for about 10 minutes.
The above photo was of my successful Babka Cake. The only thing I did differently was that I used Figs instead of raisins. Next time, I’ll use raisins since I think they will make the cake a bit sweeter.
5-6 cups of flour
1 tsp. salt
1 cake yeast (or 1 package of active dry yeast)
1/2 cups warm water (104-115°F)
3/4 cups sugar
1 1/2 cups milk
1/4 lb. butter
3/4 cups golden raisins or 1 package of figs.
1 tsp. vanilla
2 eggs, beaten
In a saucepan, heat milk. Add butter and heat until the butter is melted. Pour into a large bowl. Stir in sugar and salt. Allow to cool to lukewarm.
Crumble (or stir) yeast into warm water until yeast is dissolved. Let sit approximately 5 minutes. Add to cooled milk.
Stir in eggs and vanilla. Gradually add flour and knead dough in bowl (for approximately 1/2 hour if done by hand) until dough no longer sticks to hands. Add raisins and knead into dough.
Note: We used the kneading attachment of an electric mixer for 12 minutes.
Cover with a clean towel and let rise a in warm place, free from draft until doubled (approximately 1 hour).
Punch down dough. Cover and let rise again. Punch down again.
Divide dough in half and put into 2 greased 9×5 inch bread pans or 1 angel food cake pan (without tube) for a large traditional bread.
Mix 1 egg yolk and 2 tablespoons water. Brush top of bread with mixture and let rise uncovered in a warm place until doubled.
Bake at 350°F 30-35 minutes for 9×5 inch pans or 40-50 minutes for large pan, or until bread is golden and loaves sound hollow when tapped on the bottom.
This is a traditional Polish bread recipe that is served during the Easter and Christmas Holidays.
· Posted in Christmas, Recipes ·
|
|
|


