Easy Fall Inspired Centerpieces
I love, love, love fall! Of all the seasons, I would be happy with fall 365 days of the year! The cool crisp weather, the wonderful smell and sight of falling leaves, the idea that I can burn a cinnamon-apple candle 24 hours a day, oooh I can go on and on!
However, I will assume that you love fall as much as I do and are here to get inspired for some easy fall centerpieces, so without further a-do, here are some of the ideas I came up with this year. These ideas were also featured on BETTER KANSAS CITY, a fun new show which I am lucky to be one of the experts on. If you would like to see the video, CLICK HERE:
Or, you can read more below:
Green Beans and Asparagus Candle Centerpieces
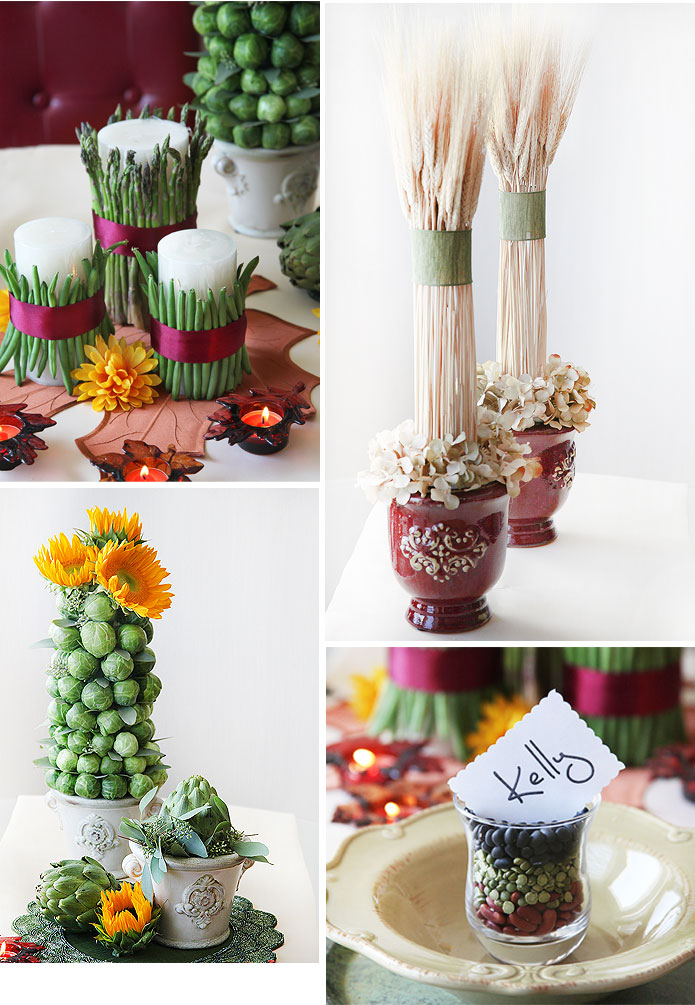
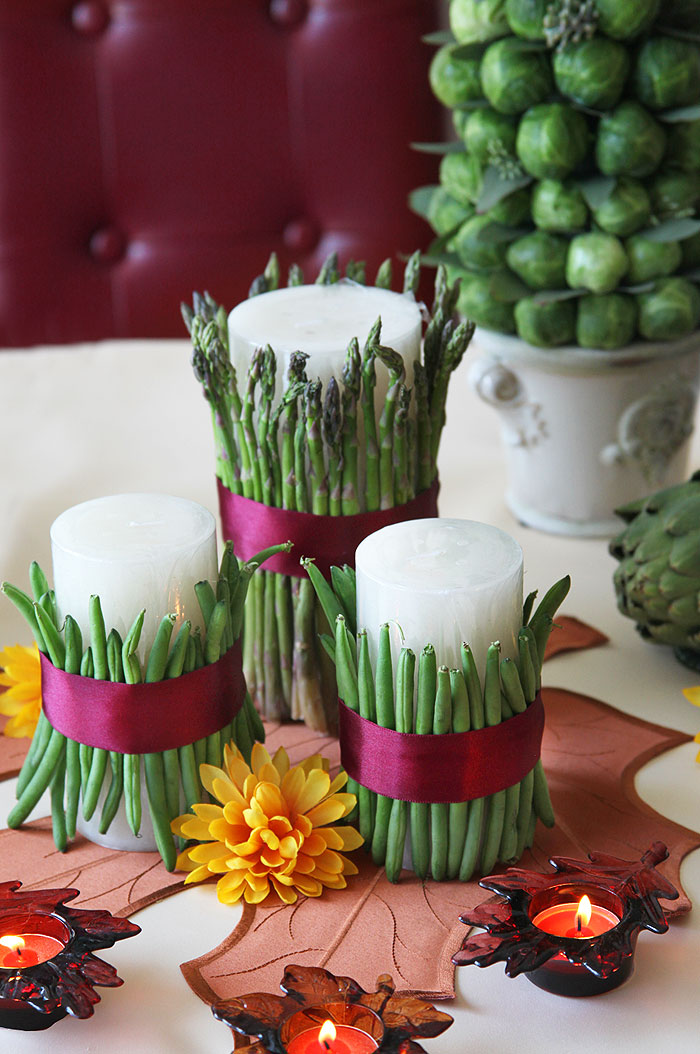
As I was surfing the web, I found a centerpiece which had green beans, asparagus, and artichokes incorporated with candles. I really loved the look but wanted to create something that was a bit more “me”. So, I nixed the artichoke candle holder (used it in another centerpiece you’ll see below) and stuck with just green beans and asparagus. Well my friends, I was in love and so was everyone else that saw this centerpiece. The assembly could not be easier. No hot glue, no tape… all you need is a rubber band!
Just place the rubber band around your candle and insert the green beans in between the rubber band and candle. Go all the way around until you have green beans completely around your candle. Find a ribbon and wrap it around the rubber band, so no one sees it. That’s it! Do the same with the asparagus and you will be good to go! The easiest project I have ever done!
Brussel Sprouts and Artichoke Centerpiece:
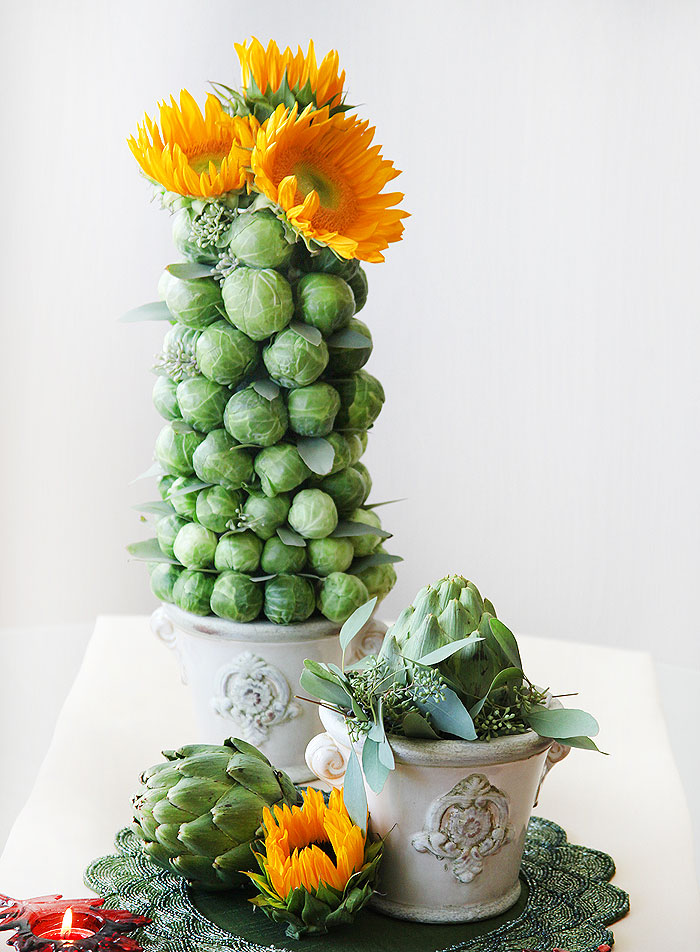
When I think of fall, I think of bounty and harvest! What better way to say “harvest” than with vegetable centerpieces. Below is the brussel sprouts topiary I created as well as an artichoke arrangement. I always like things in “threes”, so I made the brussel sprouts arrangement as my tallest element, added the artichoke arrangement as my second tallest, and brought in a sunflower and another artichoke for my shortest pieces. This vegetable trifecta worked great visually and was super simple to arrange.
For the brussel sprouts topiary, I simply used toothpicks and a triangular styrofoam form. I pierced the bottom of the brussel sprout and stuck it into the foam form. I started from the bottom and went all the way around. I did this until I got all the way to the top. On the very top, I pierced sunflowers with the toothpicks and stuck them in the form. Lastly, I used a seeded eucalyptus plant and placed the leaves to fill the empty areas of the brussel sprouts. Another simple project. The rest of the centerpieces were even easier. I simply placed an artichoke inside an urn and made a collar of seeded eucalyptus. Then, I placed a sunflower and artichoke at the base of the urn to give it a complete look. These arrangements are great together but would also look wonderful on their own.
Grain Centerpieces:
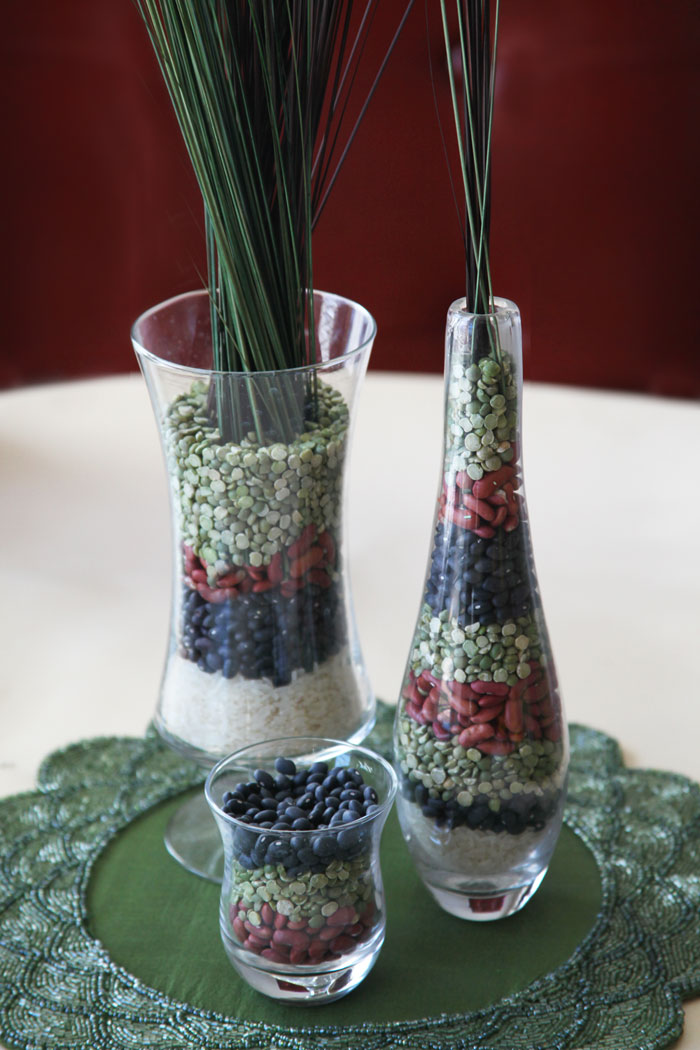
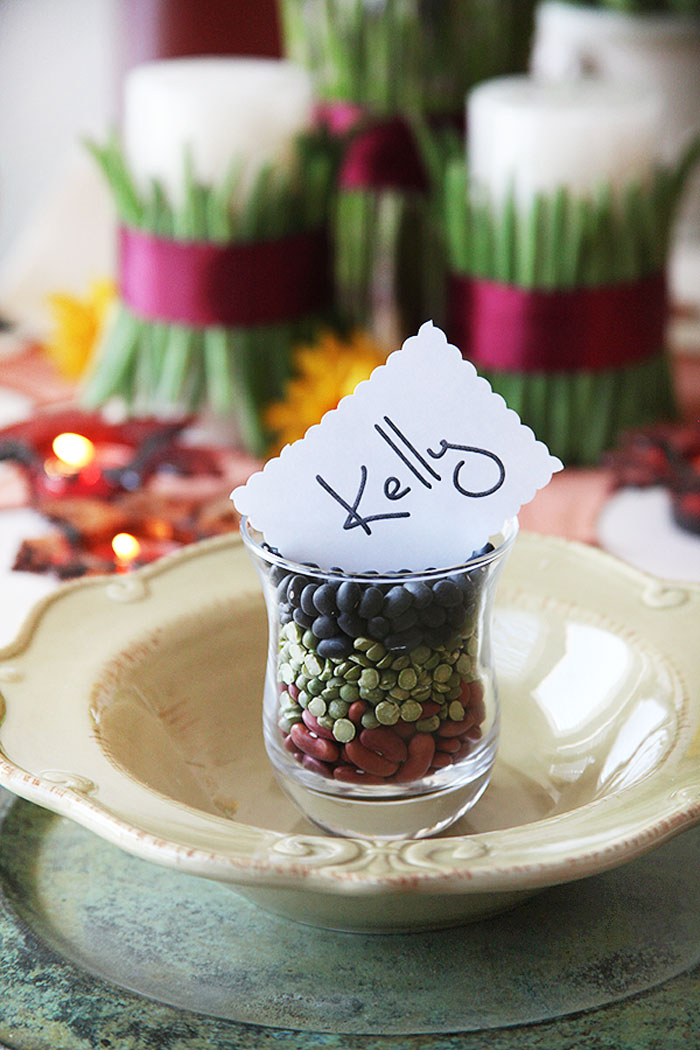
Speaking of easy, this grain centerpiece absolutely takes the cake! If you remember doing sand projects when you were a kid, you know that this project is super easy! No glue, tape or water needed! This project is also GREAT for kids! Easy and fun. Simply find the grain elements that are right for the colors of your centerpiece. My colors were green, maroon, and black. I also added white for a little contrast. I looked through my pantry and found dried peas, black beans, red beans, and rice. The rest is history!
Wheat Topiary Centerpieces:
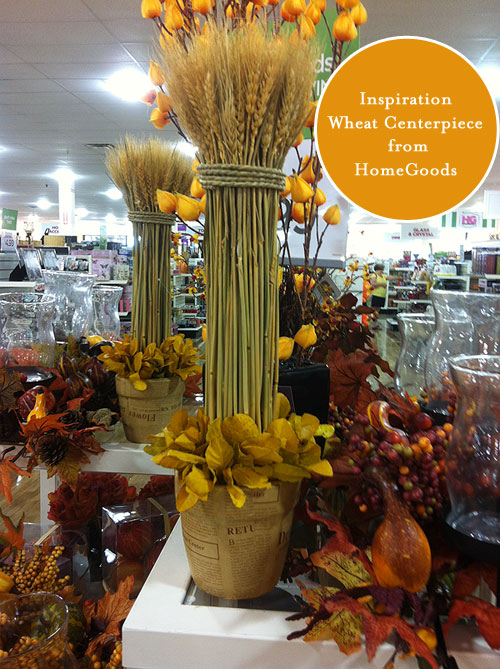
I love HomeGoods! I always manage to find something I cannot live without. And there is another reason why I shop there…this store has TONS of inspiration and that is exactly what happened during my last shopping trip. As I was walking through the store, I saw them and fell in love… the wheat topiaries I have been looking for! But alas, they were not perfect. The colors were all wrong and they were a bit small. I wanted them fuller, taller, and with a lot less “gold” in the overall design.
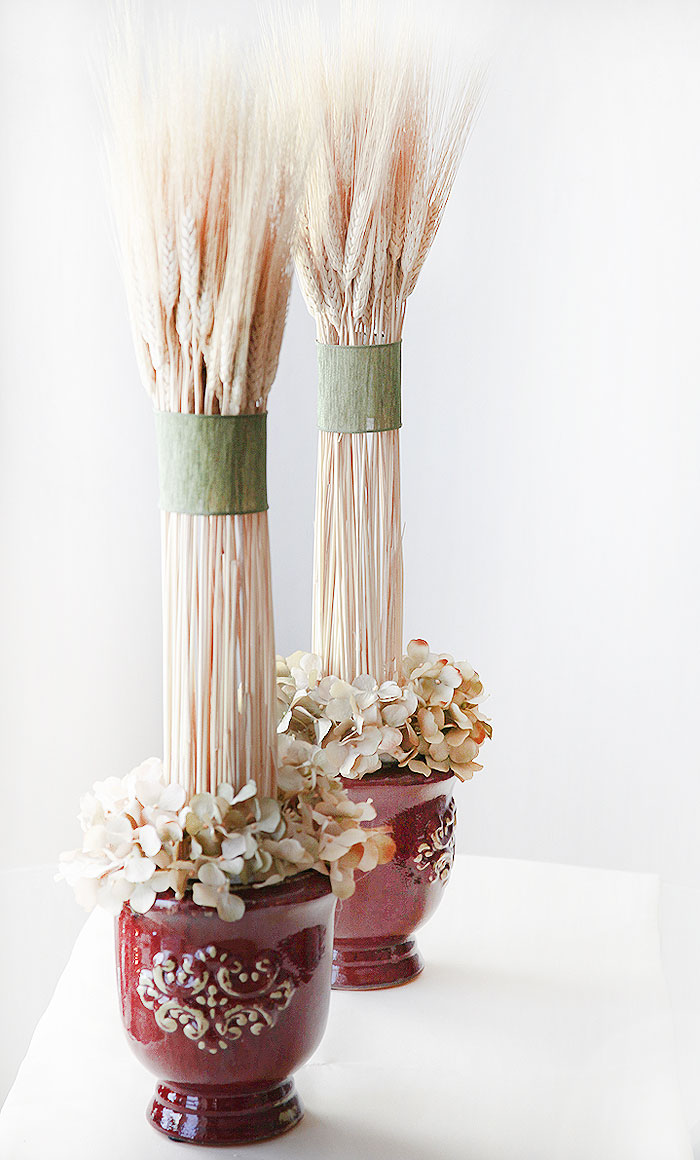
So what’s a girl to do? Well, make her own, of course! Off to Hobby Lobby I go and in no time at all, I found urns in a beautiful shiny maroon color. I also found wheat, which was 50% off… score!!! The urns were $6.99 each, the wheat was $6 and I had some silk Hydrangea flowers and green ribbon from a past project. I’m ready to design!
I used an 8 inch piece of pool noodle and placed the wheat stalks around it to give it a cylindrical shape. I secured the stalks with a rubber band and didn’t even use hot glue… although you probably could. I placed the noodle and wheat inside the urn and stuffed the paper (which the urns came wrapped in) around the noodle. The paper allowed me to keep the noodle secure but also gave me the freedom to move it if I needed to reposition anything.
I created a “collar” of silk hydrangea leaves at the base of the topiary and hot glued them to the paper which was sticking out of the urn. Lastly, I tied a green ribbon around the top part of the wheat, just like in the inspiration. And I was DONE! I really loved how the centerpieces came out. They are perfect for a centerpiece but also great for home décor pieces as well as something beautiful for your fall party buffet or even Thanksgiving!
Above is my inspiration wheat centerpiece. Beautiful but a bit small and a bit too much gold and mustard. Below is the one I made. I loved the urns a lot more and the fact that I was able to customize the height was a big plus. Overall, I’m pretty happy with the result.

